
5 Best Webcams for Astrophotography in 2024
In the field of astrophotography, you have the chance to take pictures of celestial objects that have either never been or been photographed before, and each time these objects are captured, they will always look different.
Many of us passionate about space wish to explore it, and even though technology advances quite rapidly, astrophotography will remain one of the most accessible and affordable ways in which we can explore our vast universe and immortalize it.
Each picture taken can become a trophy or an important discovery; you can also use it to create a strong following on the web. Regardless of anyone’s intentions, this field is quite accessible, especially with the use of webcams.
But one problem persists in webcam astrography, which camera is the best? All astrography cameras are good as long as they produce the results you are looking for. And though there are different types of cameras, today we are going to present to you the best, and the differences among them.
We Recommend
Best astro webcam
SVBONY
Telescope Camera
Best budget option
Logitech
Quickcam Pro
Best cam autoguider
Orion
StarShoot AutoGuider
Types of cameras for astrophotography?
In the world of astrophotography, things take a different turn in comparison to normal photographs. Generally, there are 3 options available which can satisfy your needs and each and every one of them has their own benefits. It all depends on what you want to capture, and as such, here are the main options:
Webcam – When it comes to photographing planets, webcams and dedicated astronomy cameras take the spot. The disadvantage is the fact that it won’t help you in taking photos of deep-sky objects such as galaxies, nebulae, and globular clusters.
Webcams are one of the cheapest options of doing astrophotography, but they require some modifications. You will need a 1.25’’ adapter to attach it to your telescope and a Barlow lens. Long exposure is usually not possible with webcams, but they can be modified to suit your needs. You will be amazed by what a webcam can actually capture.
DSLR – When it comes to deep-sky objects, DSLR cameras are one of the best options in doing so. They can be attached to your telescope using a T-adaptor, for example, and the camera itself allows you to attach several different lenses to it for landscape astrophotography projects.
Several technical settings and advanced controls are needed in order to get the job done. Attaching a camera lens to the DSLR is necessary for a wide-field view of space, rather than connecting the camera to a telescope. Long exposure is also usable with the DSLR, but most cameras are pricey.
ZWO – These types of cameras are specially designed for astrophotography and they have their own lenses and adaptors. They are very similar to webcams and like them, they required a PC or laptop to be connected to. Their prices vary from affordable to quite expensive.
They come in both color and mono-color versions, which have different advantages. They are capable of long exposure and DSO imaging. The monochrome variants can capture more details in a single exposure but require at around 3 times the exposure time of color cameras to produce a color image.
Benefits of webcam astrophotography
Though there are cameras designed specifically for astrophotography, webcams can also be modified to do so. Here are some advantages of using webcams in astrophotography:
- Webcams are the cheapest option for astrophotography, and they are also worth it regardless of the price.
- Webcams provide real-time feedback. Focus and exposure are adjusted on the fly to ensure the best results.
- There are no film costs and each webcam video imaging session produces a single unique image.
- Beginning your journey in astrophotography with webcams is the safest way to test your interest since you have little to lose.
- Webcams use USB plug-and-play technology, meaning they are easy to install on a computer and have fast image download times.
- With the use of proper software, some of which is free, webcams can be used as auto-guiders for other forms of astrophotography
- Webcam images are digital-friendly, meaning they can be printed, posted on the Internet, or emailed without the need for developing or scanning.
- A webcam can easily take more individual exposures in a single evening of lunar photography than someone will take in a lifetime of snapshot photography.
- A webcam shutter, the device that controls the length of exposure, is entirely electronic. This gives webcams a great advantage over standard cameras.
- Webcams can create animated images and movies of changing events such as transits of Jovian moons or lunar occultations of bright stars and the planets.
How to connect the webcam to a telescope?
Most webcams require modification in order to get them ready for their new astrophotography journey. This means that you won’t be able to use that specific webcam normally anymore, so you have to either chose an old webcam or buy one specifically for this modification process.
Now for some people, this might be quite fulfilling since it is easy to do and may give them a sense of satisfaction when they accomplish it. For other people, they simply may not have the patience and as such, they can buy an already modified webcam such as this Orion Starshoot.
The modification process is simple. You have to remove the lens around your camera and you need to see the naked sensor without the lens. Then, you have to remove the IR cut filter and you should see the IR light; this will help in revealing more details on objects.
Upon removing the lens, you will see small glass above the sensor, which is the IR cut filter. Now you have to attach the webcam unto your telescope. One way to do this is by buying an adapter. You can screw this adapter on the webcam and just slide it inside your focuser like an eyepiece. One good adapter is the Solomark Webcam Adapter.
This adapter has a threaded built-in part, and as such, you can attach any filter to enhance the view of the Moon or planets. Another way to attach your webcam, but you can’t enhance the view, is by the use of DIY. Any old 35mm film case can be used for this. They have the exact dimensions to fit in a 1.25” eyepiece holder.
Use a high-quality Barlow lens
Barlow lenses are intermediate optical devices that go between the eyepiece and the objective lens or primary mirror. It increases the magnification of any eyepiece. Even if your telescope is no short-focus instrument, the standard focal length will not be enough to capture the smallest possible details. In this case, a high-quality Barlow lens will work best.
The low-cost Barlow lenses should be avoided. They suffer from chromatic aberration, which becomes visible as colored fringes around bright objects. They also introduce ghost images and reduce contrast noticeably as such, for webcam imaging, you should always use the best Barlow lens available. Usually, a 2x Barlow lens is the most often used when viewing the Moon or planets, while some use a 3x Barlow lens.
It all depends on you and as long as the Barlow lens is good, it won’t disappoint you. The Barlow lens basically modifies the focal length, and as such, images can become twice as large or even more. Some good Barlow lenses can be brought in sets such as this one Celestron 1.25. or individually, Celestron Omni, it all depends on you.
Best webcam for astrophotography
1. Logitech Quickcam Pro
This might be a good webcam for astrophotography. The product is indeed old, but it is cheap and can do a good job.
It might be a bit fragile, so you should handle it with care. It requires a USB 2.0 to be connected to a computer.
The maximum image resolution is 1280 x 960, while its video capture resolution is 640 x 480 VGA.
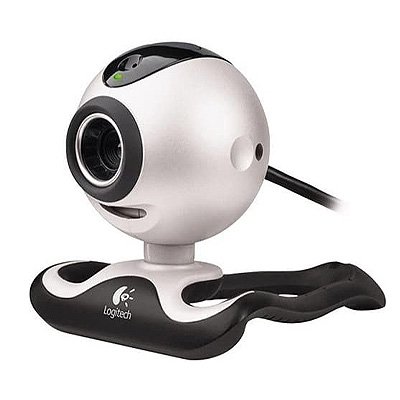
Its framerate is around 30 fps and it should be compatible with most computer system operations. It is easy to modify, but you have to separately buy an adapter if you don’t already have one. A good adapter for this model would be the Solomark Webcam Adapter 1.25inch.
It is compatible with this webcam model. You can easily take photos or capture videos of the Moon and planets with this webcam. The needed adaptor is also very affordable. This webcam also has a built-in microphone.
Check the price of Logitech Quickcam Pro here
What we liked
- Good price
- Easy to modify
- Manual focus – colors
- Should work on any windows
- Works on other systems
- Easy to install
- Good image quality
What we didn’t like
- Adaptor not included
- Modification
- Video resolution
Resolution: 1280×960 picture – 640×480 video
Sensor: CCD
Field of view: n/a
Megapixels: 1.3
2. Microsoft LifeCam Studio 1080p HD Webcam
Another good option and a fairly priced webcam is this model. This webcam may be more difficult to modify than others due to its design.
An adaptor is also needed to be purchased separately. The true color technology automatically delivers bright and colorful video, in most lighting conditions.
Its 1080p HD widescreen sensor can provide a good sharpness and 16:9 image quality while the ClearFrame Technology may provide smooth and detailed footage.
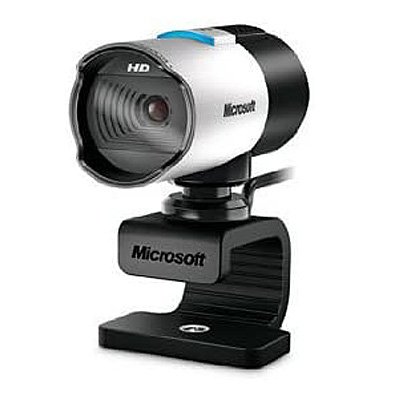
The webcam has a wide-angle field of view, it is compatible with most PC’s, and it can be connected through a 2.0 USB port.
The webcam cable length is at around 72.0 inches +6/-0 inches, so it should be enough in order to not cause any inconveniences. This webcam might be a good option for capturing photos of planets, and also make videos.
Check the price of Microsoft LifeCam Studio 1080p HD Webcam here
What we liked
- True color technology
- Durable
- ClearFrame technology
- 1080p HD widescreen sensor
- 16:9 image quality
- Compatible with most PC’s
- Fairly priced
What we didn’t like
- Might be hard to modify
Resolution: 1920 X 1080. Still Image: 5 megapixel / 2560 x 2048 pixel, interpolated photos
Sensor: CMOS
Field of view: 75° diagonal field of view
Megapixels: 5
3. Orion StarShoot USB Eyepiece Camera II
This Orion webcam has already been designed for astrophotography and as such, there is no need to modify it.
You will need a 2x Barlow lens or more depending on your focal length to capture images of Saturn or Jupiter.
It is compatible with most Windows operating systems but not with Mac. The webcam fits into any 1.25-Inch telescope focuser or 1.25-Inch step-down adapter.
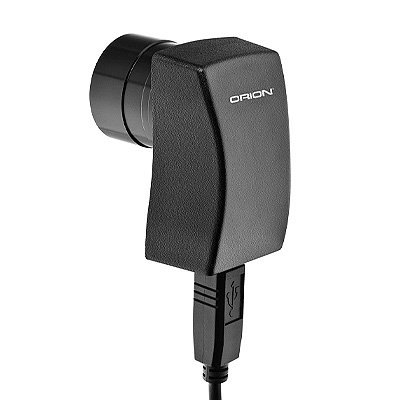
It comes with the Orion AmCap image video capture software, which is compatible with Windows XP/Vista/7/8/10 Operating Systems. The StarShoot USB Eyepiece can capture up to 24 frames per second, and it can be plugged into 2.0 and 1.1 USB ports.
It might be a good choice for capturing bright celestial objects in the solar system. The color CMOS sensor features small 5.6-Micron x 5.6-Micron pixels for great resolution on bright targets.
Check the price of Orion StarShoot USB Eyepiece Camera II here
What we liked
- No need to modify it
- Specifically designed for astrophotography
- Fairly priced
- It’s also good for terrestrial use
- Good for Solar System viewing
- Includes image video capture software
- Compatible with Windows
What we didn’t like
- Software might not be user-friendly
- USB cable might be short
Resolution: 640 x 480
Sensor: CMOS
Field of view: Same as 5mm eyepieces
Megapixels: 5.6-Micron pixels
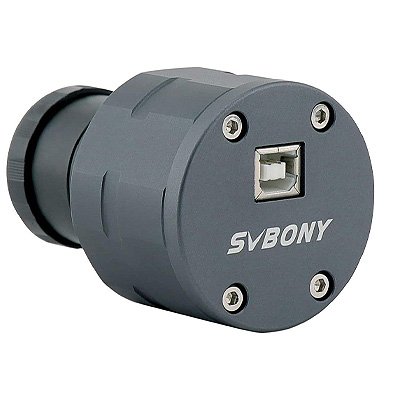
4. SVBONY SV305 Telescope Camera
This SVONOBY planetary camera might be one of the best available on the market. It is extremely sensitive, having a back-illuminated CMOS sensor.
The IMX290 sensor has very high QE and very low (0.7e-) read noise, which improved sensitivity in the visible-light and near-infrared light regions for industrial applications.
The 128MB DDR Buffer will cache the images and transfer them into the computer when the USB interface is not busy; thus, the frame will not be lost or corrupted.
The camera has ROI function – a smaller region of interest (ROI) is read out from the sensor, leaving the image scale of the object being imaged unchanged thus, it allows arbitrary resolutions to be set. The long exposure can reach 30 minutes and the camera is designed to be compatible even with c-lenses.
The camera is compatible with Linux and Windows operating systems, and it can be connected through USB 2.0 ports. The max FPS is 130fps, and the product comes with a 1.25” extension tube, user manual, cleaning cloth, and C-lens adapter.
Check the price of SVBONY SV305 Telescope Camera here
What we liked
- No need for modification
- Specifically designed for astrophotography
- Long exposure
- 128MB DDR Buffer
- C-lens adaptability
- Light pollution filter
- Works in low-temperature environments
What we didn’t like
- Maybe a bit pricey for some
- May be too small for some
Resolution: 1920 x 1080
Sensor: CMOS
Field of view: n/a
Megapixels: 2
5. Orion 52064 StarShoot AutoGuider
This Orion monochrome camera has a high-resolution, half-inch format 1.3-megapixel CMOS monochrome chip sensor, with 5.2-micron x 5.2 microns pixels for highly accurate guiding.
The small pixel size contributes to its accuracy and you can use it with a smaller and less-expensive guide scope than is possible with other guide cameras.
The AutoGuider’s short inward focus requirement of 15 mm from a typical 1.25-inch Plossl eyepiece makes it compatible with virtually any telescope.
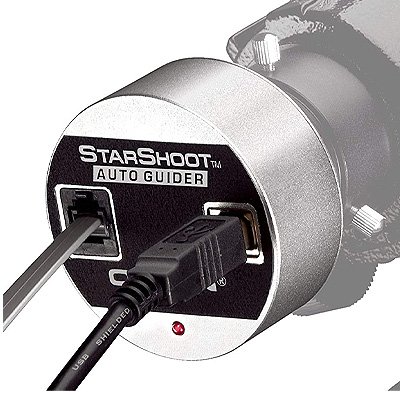
The included software offers automatic calibration and auto-guiding with a single mouse click. The camera is compatible with most OS systems, and it is connected through a 2.0 USB port.
The camera and its software are easy to set-up and compared to other auto-guiders, it is quite affordable. Since it is a monochrome camera, nothing can beat it when it comes to details and long exposures.
Check the price of Orion 52064 StarShoot AutoGuider here
What we liked
- Monochrome camera – more detail
- Highly accurate auto-guiding
- Compatible with most OS
- Automatic calibration and auto-guiding
- Long Exposure
- Sturdy and Durable
- Compatible with any mount
What we didn’t like
- Longer exposure needed than color cameras
- A bit pricey for some
- May be unsuitable for beginners
Resolution: 1280 x 1024
Sensor: Micron MT9M001 / CMOS
Field of view: Unknown
Megapixels: 1.3-megapixel / 5.2 x 5.2-micron pixels
Also read:
![10 Best Astronomy Laser Pointers Worth the Money [2024]](https://www.planetguide.net/wp-content/uploads/2020/01/astronomy-laser-pointer-768x461.jpg)
![5 Best Telescopes for Astrophotography in 2024 [+Mount]](https://www.planetguide.net/wp-content/uploads/2019/12/Depositphotos_95116882_l-2015-768x480.jpg)
![5 Best Star Trackers for DSLR in 2024 [Buyer’s Guide]](https://www.planetguide.net/wp-content/uploads/2019/12/motorized-telescope-768x461.jpg)
![5 Best Cameras for Astrophotography in 2024 [+Lens Options]](https://www.planetguide.net/wp-content/uploads/2020/01/astrophotography-camera-768x461.jpg)